(Add AP cost and Dmg/AP for Sterling) |
(→Melee: Corrected damage numbers for weapon strength requirement.) Tag: Visual edit |
||
| (37 intermediate revisions by 4 users not shown) | |||
| Line 1: | Line 1: | ||
| + | '''Weapons''' are used during combat in ''[[Dead State]]''. |
||
| − | __TOC__ |
||
| − | |||
| − | You can use any weapon, but to get the full benefit of it you need to have the required Strength or Perception listed in the item stats. Strength is never required to use a melee weapon, but to use it without penalty. If you're too weak to use it effectively, you'll do less damage with that weapon (-50%). If your strength is greater than the requirements, you'll do more damage with the weapon (+1 damage for every point beyond the minimum STR requirement). |
||
==Melee== |
==Melee== |
||
| − | Melee weapons |
+ | Melee weapons are able to inflict an array of [[Status Effects]] on an enemy. Many weapons include alternate attacks (accessed by right-clicking on the equipped weapon). |
| − | |||
| − | The listed AP for attacks is based off of the weapon's basic attack, not their alternate ones. The zDmg% field lists how much of a weapon's damage is effective against the undead (example: a machete only does 60% of its damage against the undead because it's a bladed weapon, but a Crowbar does 125%). |
||
| + | Each weapon has a [[Stats#Strength|Strength]] requirement which determines the effective damage output. A character who doesn't meet the Strength requirement can still wield the weapon but there is a 50% damage penalty. A character will do 1 additional damage for every point above the Strength requirement. |
||
| − | The listed Dmg/AP value is the average damage done per AP used in an attack, so it is a quick way to judge the base damage capabilities of a weapon against living targets. |
||
| + | The [[Skills|Melee]] skill and an opponent's [[Stats|Agility]] affect melee to-hit chance (THC). The following are some examples of the THC modifier: |
||
| + | * THC is 75% for a character with a Melee skill of 1 against an opponent with 1 Agility, but decreases by 5% for each additional point of opponent Agility. |
||
| + | * THC is 100% for a character with a Melee skill of 6 against an opponent with 1 Agility, but decreases by 5% for each additional point of opponent Agility. THC also decreases by 5% for each point below a Melee skill of 6 (against the same opponent with 1 Agility). |
||
| + | * THC is 100% for a character with a Melee skill of 10 against an opponent with 5 Agility, but decreases by 5% for each additional point of opponent Agility. THC also decreases by 5% for each point below a Melee skill of 10 (against the same opponent with 5 Agility). |
||
| + | |||
| + | *Note: Screwdrivers are good to screw zombies so, Save some! |
||
===Normal Melee=== |
===Normal Melee=== |
||
{| class="wikitable sortable" style="text-align: center;" |
{| class="wikitable sortable" style="text-align: center;" |
||
|- |
|- |
||
| − | ! class="unsortable" | !! style="min-width:130px" | Name !! data-sort-type="number" | |
+ | ! class="unsortable" | !! style="min-width:130px" | Name !! data-sort-type="number" | Basic AP<br>Cost !! data-sort-type="number" | Noise !! data-sort-type="number" | Weapon<br>Class !! data-sort-type="number" | Range !! data-sort-type="number" | Damage !! data-sort-type="number" | (Avg. Dmg.) !! data-sort-type="number" | (Dmg./AP) !! data-sort-type="number" | Undead<br>Dmg Mod !! data-sort-type="number" | Critical<br>Chance !! data-sort-type="number" | Strength<br>Required !! data-sort-type="number" | Break<br>Chance !! data-sort-type="number" | Weight !! data-sort-type="number" | Weapon Effects |
|- |
|- |
||
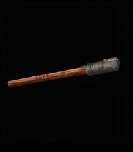
| − | | style="background-color:#000" | [[File:Screwdriver.png|50px|none]] || Screwdriver || |
+ | | style="background-color:#000" | [[File:Screwdriver.png|50px|none]] || Screwdriver || 2 || 1 || Implement<br>(1 Hand) || 1 || 1-10<br>(Piercing) || 5.50 || 2.75 || 115% || 5%<br>(3.25x dmg) || 1 || 5% || 0.50 lbs || [[Weapon Abilities#Counter|Counter]] (20%), [[Status Effects#Bleeding|Bleed]] (40%) |
|- |
|- |
||
| − | | style="background-color:#000" | [[File:KitchenKnife.png|50px|none]] || Kitchen Knife || 3 || |
+ | | style="background-color:#000" | [[File:KitchenKnife.png|50px|none]] || Kitchen Knife || 3 || 2 || Knife<br>(1 Hand) || 1 || 3-10<br>(Slash) || 6.50 || 2.17 || 40% || 10%<br>(2.00x dmg) || 1 || 5% || 1.00 lbs || Counter (40%), Bleed (40%) |
|- |
|- |
||
| − | | style="background-color:#000" | [[File:MakeshiftPike.png|50px|none]] || Makeshift Pike || 5 || |
+ | | style="background-color:#000" | [[File:MakeshiftPike.png|50px|none]] || Makeshift Pike || 5 || 3 || Polearm<br>(2 Hand) || 1 || 5-20<br>(Piercing) || 12.50 || 2.50 || 40% || 5%<br>(3.00x dmg) || 2 || 5% || 1.00 lbs || [[Weapon Abilities#Knockback|Knockback]] (10%), [[Weapon Abilities#Knockdown|Knockdown]] (10%) |
|- |
|- |
||
| − | | style="background-color:#000" | [[File:Sickle.png|50px|none]] || Sickle || |
+ | | style="background-color:#000" | [[File:Sickle.png|50px|none]] || Sickle || 3 || 6 || Knife<br>(1 Hand) || 1 || 5-40<br>(Slash) || 22.5 || 7.50 || 80% || 5%<br>(3.00x dmg) || 3 || 10% || 1.00 lbs || Bleed (40%) |
|- |
|- |
||
| − | | style="background-color:#000" | [[File:Cleaver.png|50px|none]] || Cleaver || |
+ | | style="background-color:#000" | [[File:Cleaver.png|50px|none]] || Cleaver || 4 || 4 || Knife<br>(1 Hand) || 1 || 5-15<br>(Slash) || 10.00 || 2.50 || 50% || 10%<br>(2.00x dmg) || 1 || 5% || 1.00 lbs || Bleed (20%), Counter (5%) |
|- |
|- |
||
| − | | style="background-color:#000" | [[File:WoodPlank.png|50px|none]] || Wood Plank || |
+ | | style="background-color:#000" | [[File:WoodPlank.png|50px|none]] || Wood Plank || 4 || 6 || Bat<br>(2 Hand) || 2 || 5-18<br>(Bludgeoning) || 11.50 || 2.88 || 100% || 5%<br>(2.00x dmg) || 2 || 5% || 2.00 lbs || [[Status Effects#Dizzy|Dizzy]] (15%), Knockback (5%) |
|- |
|- |
||
| − | | style="background-color:#000" | [[File:ClawHammer.png|50px|none]] || Claw Hammer || |
+ | | style="background-color:#000" | [[File:ClawHammer.png|50px|none]] || Claw Hammer || 3 || 4 || Hammer<br>(1 Hand) || 1 || 6-15<br>(Bludgeoning) || 10.50 || 3.50 || 125% || 5%<br>(2.00x dmg) || 2 || || 2.50 lbs || Counter (35%), Dizzy (20%) |
|- |
|- |
||
| − | | style="background-color:#000" | [[File:Hatchet.png|50px|none]] || Hatchet || |
+ | | style="background-color:#000" | [[File:Hatchet.png|50px|none]] || Hatchet || 4 || 4 || Axe<br>(1 Hand) || 1 || 8-18<br>(Slash) || 13.00 || 3.25 || 100% || 5%<br>(3.00x dmg) || 3 || 5% || 2.00 lbs || Counter (5%), Bleed (40%) |
|- |
|- |
||
| − | | style="background-color:#000" | [[File:Machete.png|50px|none]] || Machete || |
+ | | style="background-color:#000" | [[File:Machete.png|50px|none]] || Machete || 4 || 4 || Knife<br>(1 Hand) || 1 || 8-20<br>(Slash) || 14.00 || 3.50 || 60% || 10%<br>(2.25x dmg) || 2 || || 2.00 lbs || Bleed (50%), Counter (5%) |
|- |
|- |
||
| − | | style="background-color:#000" | [[File:Tiller.png|50px|none]] || Tiller || |
+ | | style="background-color:#000" | [[File:Tiller.png|50px|none]] || Tiller || 5 || 5 || Polearm<br>(2 Hand) || 2 || 10-30<br>(Piercing) || 20.00 || 4.00 || 80% || 10%<br>(3.00x dmg) || 3 || || 5.00 lbs || Knockback (10%), Bleed (5%) |
|- |
|- |
||
| − | | style="background-color:#000" | [[File:Crowbar.png|50px|none]] || Crowbar || |
+ | | style="background-color:#000" | [[File:Crowbar.png|50px|none]] || Crowbar || 5 || 5 || Club<br>(1 Hand) || 1 || 12-20<br>(Bludgeoning) || 16.00 || 3.20 || 125% || 5%<br>(2.50x dmg) || 4 || || 4.00 lbs || Knockdown (10%), Dizzy (25%) |
|- |
|- |
||
| − | | style="background-color:#000" | [[File:Nightstick.png|50px|none]] || Nightstick || |
+ | | style="background-color:#000" | [[File:Nightstick.png|50px|none]] || Nightstick || 4 || 4 || Club<br>(1 Hand) || 1 || 12-20<br>(Bludgeoning) || 16.00 || 4.00 || 110% || 3%<br>(2.00x dmg) || 3 || || 1.00 lbs || Dizzy (30%), Counter (20%) |
|- |
|- |
||
| − | | style="background-color:#000" | [[File:CombatKnife.png|50px|none]] || Combat Knife || |
+ | | style="background-color:#000" | [[File:CombatKnife.png|50px|none]] || Combat Knife || 3 || 1 || Knife<br>(1 Hand) || 1 || 12-18<br>(Slash) || 15.00 || 5.00 || 50% || 10%<br>(2.00x dmg) || 1 || || 1.00 lbs || Counter (50%), Bleed (35%) |
|- |
|- |
||
| − | | style="background-color:#000" | [[File:Kukri.png|50px|none]] || Kukri || |
+ | | style="background-color:#000" | [[File:Kukri.png|50px|none]] || Kukri || 3 || 1 || Knife<br>(1 Hand) || 1 || 15-24<br>(Slash) || 19.50 || 6.50 || 80% || 5%<br>(3.00x dmg) || 1 || || 1.00 lbs || Counter (75%), Bleed (50%) |
|- |
|- |
||
| − | | style="background-color:#000" | [[File:Pitchfork.png|50px|none]] || Pitchfork || |
+ | | style="background-color:#000" | [[File:Pitchfork.png|50px|none]] || Pitchfork || 5 || 5 || Polearm<br>(2 Hand) || 2 || 15-40<br>(Piercing) || 27.50 || 5.50 || 50% || 5%<br>(3.25x dmg) || 4 || || 4.00 lbs || Knockback (15%), Knockdown (25%), Bleed (10%) |
|- |
|- |
||
| − | | style="background-color:#000" | [[File:BowieKnife.png|50px|none]] || Bowie Knife || |
+ | | style="background-color:#000" | [[File:BowieKnife.png|50px|none]] || Bowie Knife || 4 || 2 || Knife<br>(1 Hand) || 1 || 18-30<br>(Slash) || 24.00 || 6.00 || 70% || 5%<br>(3.00x dmg) || 3 || || 2.00 lbs || Counter (50%), Bleed (50%) |
|- |
|- |
||
| − | | style="background-color:#000" | [[File:PipeWrench.png|50px|none]] || Pipe Wrench || |
+ | | style="background-color:#000" | [[File:PipeWrench.png|50px|none]] || Pipe Wrench || 5 || 6 || Club<br>(1 Hand) || 1 || 18-25<br>(Bludgeoning) || 21.50 || 4.30 || 120% || 5%<br>(2.50x dmg) || 6 || || 3.00 lbs || Dizzy (20%), Knockdown (10%) |
|- |
|- |
||
| − | | style="background-color:#000" | [[File:CombatMachete.png|50px|none]] || Combat Machete || |
+ | | style="background-color:#000" | [[File:CombatMachete.png|50px|none]] || Combat Machete || 4 || 3 || Knife<br>(1 Hand) || 1 || 18-26<br>(Slash) || 22.00 || 5.50 || 70% || 15%<br>(2.25x dmg) || 3 || || 1.00 lbs || Bleed (40%), Counter (10%) |
|- |
|- |
||
| − | | style="background-color:#000" | [[File:TreeTrimmer.png|50px|none]] || Tree Trimmer || |
+ | | style="background-color:#000" | [[File:TreeTrimmer.png|50px|none]] || Tree Trimmer || 5 || 4 || Polearm<br>(2 Hand) || 2 || 18-30<br>(Slash) || 24.00 || 4.80 || 85% || 5%<br>(2.50x dmg) || 5 || || 5.00 lbs || Knockback (10%), Knockdown (15%), Bleed (25%) |
|- |
|- |
||
| − | | style="background-color:#000" | [[File:BaseballBat.png|50px|none]] || Baseball Bat || |
+ | | style="background-color:#000" | [[File:BaseballBat.png|50px|none]] || Baseball Bat || 4 || 4 || Bat<br>(2 Hand) || 1 || 18-28<br>(Bludgeoning) || 23.00 || 5.75 || 150% || 5%<br>(2.00x dmg) || 4 || || 2.00 lbs || Dizzy (20%) |
|- |
|- |
||
| − | | style="background-color:#000" | [[File:CrashAxe.png|50px|none]] || Crash Axe || |
+ | | style="background-color:#000" | [[File:CrashAxe.png|50px|none]] || Crash Axe || 4 || 4 || Axe<br>(1 Hand) || 1 || 20-30<br>(Piercing) || 25.00 || 6.25 || 125% || 8%<br>(2.25x dmg) || 3 || || 2.00 lbs || Counter (50%), Bleed (50%) |
|- |
|- |
||
| − | | style="background-color:#000" | [[File:WoodAxe.png|50px|none]] || Wood Axe || |
+ | | style="background-color:#000" | [[File:WoodAxe.png|50px|none]] || Wood Axe || 6 || 6 || Axe<br>(2 Hand) || 1 || 20-35<br>(Slash) || 27.50 || 4.58 || 150% || 10%<br>(2.25x dmg) || 5 || || 7.00 lbs || Bleed (15%) |
|- |
|- |
||
| − | | style="background-color:#000" | [[File:Pickaxe.png|50px|none]] || Pickaxe || |
+ | | style="background-color:#000" | [[File:Pickaxe.png|50px|none]] || Pickaxe || 6 || 6 || Axe<br>(2 Hand) || 1 || 20-35<br>(Piercing) || 27.50 || 4.58 || 125% || 8%<br>(3.00x dmg) || 7 || || 4.00 lbs || Bleed (10%) |
|- |
|- |
||
| − | | style="background-color:#000" | [[File:Shovel.png|50px|none]] || Shovel || |
+ | | style="background-color:#000" | [[File:Shovel.png|50px|none]] || Shovel || 5 || 6 || Hammer<br>(2 Hand) || 1 || 20-30<br>(Bludgeoning) || 25.00 || 5.00 || 110% || 5%<br>(2.25x dmg) || 4 || || 5.00 lbs || Knockback (10%), Knockdown (15%), Dizzy (20%) |
|- |
|- |
||
| − | | style="background-color:#000" | [[File:Spear.png|50px|none]] || Spear || |
+ | | style="background-color:#000" | [[File:Spear.png|50px|none]] || Spear || 5 || 4 || Polearm<br>(2 Hand) || 2 || 28-34<br>(Piercing) || 31.00 || 6.20 || 65% || 5%<br>(3.00x dmg) || 3 || || 3.00 lbs || Knockdown (35%), Bleed (40%) |
|- |
|- |
||
| − | | style="background-color:#000" | [[File:TelescopingBaton.png|50px|none]] || Telescoping Baton || |
+ | | style="background-color:#000" | [[File:TelescopingBaton.png|50px|none]] || Telescoping Baton || 3 || 3 || Club<br>(1 Hand) || 1 || 20-25<br>(Bludgeoning) || 22.50 || 7.50 || 100% || 10%<br>(2.00x dmg) || 2 || || 2.00 lbs || Counter (40%), Dizzy (35%) |
|- |
|- |
||
| − | | style="background-color:#000" | [[File:AluminiumBat.png|50px|none]] || Aluminium Bat || |
+ | | style="background-color:#000" | [[File:AluminiumBat.png|50px|none]] || Aluminium Bat || 4 || 5 || Bat<br>(2 Hand) || 1 || 24-32<br>(Bludgeoning) || 28.00 || 7.00 || 125% || 10%<br>(2.00x dmg) || 3 || || 2.00 lbs || Knockback (25%), Dizzy (30%) |
|- |
|- |
||
| − | | style="background-color:#000" | [[File:BastardSword.png|50px|none]] || Bastard Sword || |
+ | | style="background-color:#000" | [[File:BastardSword.png|50px|none]] || Bastard Sword || 5 || 7 || Blade<br>(2 Hand) || 1 || 28-50<br>(Slash) || 39.00 || 7.80 || 75% || 15%<br>(2.75x dmg) || 7 || || 10.00 lbs || Bleed (60%) |
|- |
|- |
||
| − | | style="background-color:#000" | [[File:Sledgehammer.png|50px|none]] || Sledgehammer || |
+ | | style="background-color:#000" | [[File:Sledgehammer.png|50px|none]] || Sledgehammer || 7 || 7 || Hammer<br>(2 Hand) || 1 || 28-50<br>(Bludgeoning) || 39.00 || 5.57 || 200% || 8%<br>(2.00x dmg) || 6 || || 6.00 lbs || Knockdown (15%, Dizzy (10%), Knockback (15%) |
|- |
|- |
||
| − | | style="background-color:#000" | [[File:BrushHook.png|50px|none]] || Brush Hook || |
+ | | style="background-color:#000" | [[File:BrushHook.png|50px|none]] || Brush Hook || 5 || 5 || Axe<br>(2 Hand) || 1 || 30-45<br>(Slash) || 37.50 || 7.50 || 150% || 8%<br>(2.50x dmg) || 6 || || 3.00 lbs || Bleed (25%) |
|- |
|- |
||
| − | | style="background-color:#000" | [[File:FireAxe.png|50px|none]] || |
+ | | style="background-color:#000" | [[File:FireAxe.png|50px|none]] || Fire Axe || 6 || 5 || Axe<br>(2 Hand) || 1 || 35-50<br>(Slash) || 42.50 || 7.08 || 150% || 8%<br>(2.50x dmg) || 4 || || 4.00 lbs || Bleed (35%) |
|- |
|- |
||
| − | | style="background-color:#000" | [[File:RailroadHammer.png|50px|none]] || Railroad Hammer || |
+ | | style="background-color:#000" | [[File:RailroadHammer.png|50px|none]] || Railroad Hammer || 7 || 8 || Hammer<br>(2 Hand) || 1 || 45-70<br>(Bludgeoning) || 57.50 || 8.21 || 200% || 8%<br>(2.00x dmg) || 8 || || 12.00 lbs || Knockback (20%), Knockdown (20%), Dizzy (15%) |
|- |
|- |
||
| − | | style="background-color:#000" | [[File:CricketBat.png|50px|none]] || Cricket Bat || |
+ | | style="background-color:#000" | [[File:CricketBat.png|50px|none]] || Cricket Bat || 4 || 4 || Bat<br>(2 Hand) || 1 || 22-36<br>(Bludgeoning) || 29.00 || 7.25 || 125% || 10%<br>(2.00x dmg) || 4 || || 3.00 lbs || Knockback (20%), Dizzy (25%) |
| − | |- |
||
| − | | style="background-color:#000" | [[File:Katana.png|50px|none]] || Katana || 25 || 55 || 40 || 2 || 1 || 5 || 8.00 || 3 || 5 || 10 || 50% |
||
| − | |- |
||
| − | | style="background-color:#000" | [[File:Halbert.png|50px|none]] || Halberd || 25 || 48 || 36.5 || 2 || 2 || 6 || 6.08 || 4 || 6 || 4 || 85% |
||
|} |
|} |
||
| Line 89: | Line 87: | ||
{| class="wikitable sortable" style="text-align: center;" |
{| class="wikitable sortable" style="text-align: center;" |
||
|- |
|- |
||
| − | ! class="unsortable" | !! style="min-width:130px" | Name !! data-sort-type="number" | |
+ | ! class="unsortable" | !! style="min-width:130px" | Name !! data-sort-type="number" | Basic AP<br>Cost !! data-sort-type="number" | Noise !! data-sort-type="number" | Weapon<br>Class !! data-sort-type="number" | Range !! data-sort-type="number" | Damage !! data-sort-type="number" | (Avg. Dmg.) !! data-sort-type="number" | (Dmg./AP) !! data-sort-type="number" | Undead<br>Dmg Mod !! data-sort-type="number" | Critical<br>Chance !! data-sort-type="number" | Strength<br>Required !! data-sort-type="number" | Weight !! data-sort-type="number" | Weapon Effects |
|- |
|- |
||
| − | | style="background-color:#000" | [[File:MrStabby.png|50px|none]] || [[ |
+ | | style="background-color:#000" | [[File:MrStabby.png|50px|none]] || [[Marshall Streeter|Mr. Stabby]] || 4 || 2 || Knife<br>(1 Hand) || 1 || 22-40<br>(Slash) || 31.00 || 7.75 || 70% || 5%<br>(3.00x dmg) || 3 || 2.00 lbs || [[Weapon Abilities#Counter|Counter]] (60%), [[Status Effects#Bleeding|Bleed]] (60%) |
|- |
|- |
||
| − | | style="background-color:#000" | [[File:CarbonSteelTonfa.png|50px|none]] || [[ |
+ | | style="background-color:#000" | [[File:CarbonSteelTonfa.png|50px|none]] || [[Named Enemies#The 8-bit Team|Carbon Steel Tonfa]] || 4 || 4 || Club<br>(1 Hand) || 1 || 22-26<br>(Bludgeoning) || 24.00 || 6.00 || 125% || 10%<br>(2.00x dmg) || 3 || 1.50 lbs || [[Status Effects#Dizzy|Dizzy]] (35%), Counter (100%) |
|- |
|- |
||
| − | | style="background-color:#000" | [[File:DisasterAxe.png|50px|none]] || [[Jefferson Claude|Disaster Axe]] || |
+ | | style="background-color:#000" | [[File:DisasterAxe.png|50px|none]] || [[Jefferson Claude|Disaster Axe]] || 4 || 4 || Axe<br>(1 Hand) || 1 || 30-40<br>(Piercing) || 35.00 || 8.75 || 125% || 10%<br>(2.50x dmg) || 3 || 2.50 lbs || Counter (50%), Bleed (60%), Dizzy (15%) |
|- |
|- |
||
| − | | style="background-color:#000" | [[File:ElectricBaton.png|50px|none]] || [[ |
+ | | style="background-color:#000" | [[File:ElectricBaton.png|50px|none]] || [[Named Enemies#Sandford|Electric Baton]] || 4 || 6 || Club<br>(1 Hand) || 1 || 25-32<br>(Bludgeoning) || 28.50 || 7.13 || 100% || 10%<br>(2.00x dmg) || 4 || 2.00 lbs || Counter (45%), Dizzy (45%), [[Weapon Abilities#Knockdown|Knockdown]] (25%) |
|- |
|- |
||
| − | | style="background-color:#000" | [[File:RedOnYou.png|50px|none]] || [[ |
+ | | style="background-color:#000" | [[File:RedOnYou.png|50px|none]] || [[Named Enemies#Shauna & Edwina|Red On You]] || 4 || 4 || Bat<br>(2 Hand) || 1 || 30-50<br>(Bludgeoning) || 40.00 || 10.00 || 125% || 10%<br>(2.25x dmg) || 4 || 3.00 lbs || [[Weapon Abilities#Knockback|Knockback]] (30%), Dizzy (45%) |
|- |
|- |
||
| − | | style="background-color:#000" | [[File:FlangedMace.png|50px|none]] || [[ |
+ | | style="background-color:#000" | [[File:FlangedMace.png|50px|none]] || [[Named Enemies#The Royal Flush Gang|Flanged Mace]] || 5 || 5 || Club<br>(1 Hand) || 1 || 38-45<br>(Bludgeoning) || 41.50 || 8.30 || 150% || 10%<br>(2.75x dmg) || 8 || 5.00 lbs || Knockdown (15%), Dizzy (40%) |
|- |
|- |
||
| − | | style="background-color:#000" | [[File:Dragoon.png|50px|none]] || [[ |
+ | | style="background-color:#000" | [[File:Dragoon.png|50px|none]] || [[Named Enemies#Rue Britannia|Dragoon]] || 5 || 4 || Polearm<br>(2 Hand) || 2 || 40-45<br>(Piercing) || 42.50 || 8.50 || 65% || 10%<br>(3.00x dmg) || 3 || 3.00 lbs || Knockdown (45%), Bleed (40%), Knockback (20%) |
|- |
|- |
||
| − | | style="background-color:#000" | [[File:Unasume.png|50px|none]] || [[ |
+ | | style="background-color:#000" | [[File:Unasume.png|50px|none]] || [[Named Enemies#Predator Boss|Unasume]] || 5 || 3 || Blade<br>(2 Hand) || 1 || 40-60<br>(Slash) || 50.00 || 10.00 || 70% || 5%<br>(3.00x dmg) || 5 || 9.50 lbs || Bleed (70%) |
|- |
|- |
||
| − | | style="background-color:#000" | [[File:CarbonFiberBat.png|50px|none]] || [[ |
+ | | style="background-color:#000" | [[File:CarbonFiberBat.png|50px|none]] || [[Named Enemies#The 8-bit Team|Carbon Fiber Bat]] || 5 || 5 || Bat<br>(2 Hand) || 1 || 42-55<br>(Bludgeoning) || 48.50 || 9.70 || 125% || 5%<br>(2.50x dmg) || 4 || 1.50 lbs || Knockback (25%), Dizzy (45%), Knockback (10%) |
|- |
|- |
||
| − | | style="background-color:#000" | [[File:Hackjob.png|50px|none]] || [[ |
+ | | style="background-color:#000" | [[File:Hackjob.png|50px|none]] || [[Named Enemies#Rash|Hackjob]] || 6 || 5 || Axe<br>(2 Hand) || 1 || 45-60<br>(Slash) || 52.50 || 8.75 || 125% || 15%<br>(2.75x dmg) || 4 || 5.00 lbs || Bleed (45%) |
|- |
|- |
||
| − | | style="background-color:#000" | [[File:IntimacyProblems.png|50px|none]] || [[ |
+ | | style="background-color:#000" | [[File:IntimacyProblems.png|50px|none]] || [[Named Enemies#The Royal Flush Gang|Intimacy Problems]] || 6 || 4 || Polearm<br>(2 Hand) || 2 || 40-65<br>(Slash) || 52.50 || 8.75 || 100% || 5%<br>(3.00x dmg) || 6 || 4.00 lbs || Knockback (30%), Knockdown (40%), Bleed (35%) |
|- |
|- |
||
| − | | style="background-color:#000" | [[File:Snowblind.png|50px|none]] || [[ |
+ | | style="background-color:#000" | [[File:Snowblind.png|50px|none]] || [[Named Enemies#The Royal Flush Gang|Snowblind]] || 5 || 7 || Blade<br>(2 Hand) || 1 || 48-65<br>(Slash) || 56.50 || 11.30 || 100% || 15%<br>(3.00x dmg) || 8 || 11.00 lbs || Bleed (70%), Dizzy (15%) |
|- |
|- |
||
| − | | style="background-color:#000" | [[File:IndustrialHammer.png|50px|none]] || [[Filmore|Industrial Hammer]] || |
+ | | style="background-color:#000" | [[File:IndustrialHammer.png|50px|none]] || [[Filmore|Industrial Hammer]] || 7 || 8 || Hammer<br>(2 Hand) || 1 || 65-100<br>(Bludgeoning) || 82.50 || 11.79 || 200% || 8%<br>(2.00x dmg) || 10 || 20.00 lbs || Knockback (25%), Knockdown (25%), Dizzy (30%) |
|} |
|} |
||
==Ranged== |
==Ranged== |
||
| + | Ranged weapon effectiveness is determined by the user's [[Ranged]] [[Skills|skill]] and [[Perception]] skill, as well as weapon range (how far away an opponent is) and the opponent's [[Stats|Agility]]. The Ranged skill affects damage output and Critical Chance, while the Perception skill and opponent Agility affects to-hit chance (THC). Weapon range affects all ranged modifiers (Damage, Critical Chance, and THC). |
||
| − | Ranged weapons do not have any special effects associated with them, but make up for this with massive damage and - for some of them - the potential to be modded. Although there is a chance to find a modded weapon out in the field, the best chance to use one is simply to craft one on your own. |
||
| + | |||
| + | Damage output and Critical Chance are determined by the [[Ranged]] [[Skills|skill]] and affected by weapon range. A damage bonus (+10% to +50%) and Critical Chance bonus (+5% to +45%) will be applied for each point of Ranged skill above the respective range to target. For example, a 10% damage bonus is applied when the character's Ranged skill is 2 against an opponent at a range of 1. The bonus increases by 5% for each additional point of Ranged skill. In this same scenario (Ranged skill of 2 and target range 1), the Critical Chance bonus is 5% and increases by 5% for each additional point of Ranged skill. |
||
| + | |||
| + | A character's to-hit chance (THC) is determined by the [[Skills|Ranged skill]], [[Perception]] [[Stats|Stat]], weapon range, how far away an opponent is/enemy range, equipment/weapon bonuses, and the opponent's [[Stats|Agility]]. Although the manual does not indicate it, ranged skill gives 5% bonus THC per level. It seems the way ranged THC is described in the manual ("the attacker to-hit chance is measured by comparing the attacker's Perception skill with the Weapon Range (the effective distance away that a weapon can hit), then calculating that versus the target's Agility stat ") is not the way it was implemented in game. If it was, Sniper Rifles with 15 range would always give a 0% base THC even with a maximum 10 perception. So the "Ranged To-Hit Chart" in the manual that uses the term "Weapon Range", should have used the term range to target or enemy range. The range stat of a weapon has an effect on THC that is different from what the chart indicates-it is a linear 5% per Weapon Range inside the weapons range (0% at maximum range). So an enemy at a range of 6 shot by a weapon with Weapon Range 8 will receive a 10% bonus THC. Once you go beyond the Weapon Range there is a penalty of 25% per square of range. |
||
| + | |||
| + | THC decreases by 25% for every enemy range increment above the respective Perception skill. For example, a character with a Perception skill of 3, will have 100% THC against an enemy at a range of 3 (or closer). In the same scenario (with a Perception skill of 3), if enemy range is 4, then THC becomes 75%; a range of 5 will be 50% THC, a range of 6 is 25% THC, and a range of 7 or greater will be 0% THC. An opponent's Agility will affect THC anywhere from -10% to -55%. An opponent with 1 Agility will reduce THC by 10%, with a further reduction of 5% for each additional point of Agility. |
||
| + | |||
| + | This was tested in game with a variety of weapons on various Perception stat levels and ranged skill levels. For example, a Hunting Rifle (10 Weapon Range), Range skill of 1, Perception 5, Enemy Range 7, Enemy Agility 8: in game the THC is displayed as 25% (35% with Marksman Gloves). Comparing Perception to Enemy range, the base THC is 50%, Ranged skill of 1 gives 5%, enemy agility reduces THC by 45%. Weapon range surpasses enemy range by 3. This is +5% for each additional range so 15%. 50%+5%-45%+15%=25% The exact same set up with Ranged Skill 9 had a 65% THC (40% more for the 8 higher skill). So the calculation is: Base THC% + Ranged Skill bonus - Enemy Agility modifier +/- Weapon Range Modifier + Equipment modifiers + Weapon Bonuses. |
||
| + | |||
| + | However, this seems to break with the Sniper Rifle and Laser Sighted MS4 THC values, as when tested with 15 Weapon Range, Perception 5, Ranged Skill 1, Enemy Range 13, Enemy Agility 8 the game displayed THC of 45%. This should have been: Perception vs enemy range=0%, Ranged Skill +5%, Enemy Agility -45%. Weapon Range vs enemy range gives 2 extra weapon range=+5%+5%=+10% THC. This sums to a -30% THC and should have displayed as 0% So there is an extra 75% THC coming from somewhere, possibly a hidden bonus on the Sniper Rifle. Similarly, the Laser Sighted MS4 seems to have a hidden +50% THC as all calculations were off by this amount. So there are some undisclosed bonuses when using certain guns. |
||
| + | |||
| + | <br /> |
||
===Normal Ranged=== |
===Normal Ranged=== |
||
{| class="wikitable sortable" style="text-align: center;" |
{| class="wikitable sortable" style="text-align: center;" |
||
|- |
|- |
||
| − | ! class="unsortable" | !! style="min-width:130px" | Name !! data-sort-type="number" | |
+ | ! class="unsortable" | !! style="min-width:130px" | Name !! data-sort-type="number" | Basic AP<br>Cost !! data-sort-type="number" | Noise !! data-sort-type="number" | Weapon<br>Class !! data-sort-type="number" | Range !! data-sort-type="number" | Damage !! data-sort-type="number" | (Avg. Dmg.) !! data-sort-type="number" | (Dmg./AP) !! data-sort-type="number" | Critical<br>Chance !! data-sort-type="number" | Ammo<br>Capacity !! data-sort-type="number" | [[Ammunition|Ammo]]<br>Type !! data-sort-type="number" | Weight !! data-sort-type="number" | Weapon Effects |
|- |
|- |
||
| − | | style="background-color:#000" | [[File:38Snubnose.png|50px|none]] || .38 Snubnose || |
+ | | style="background-color:#000" | [[File:38Snubnose.png|50px|none]] || .38 Snubnose || 4 || 25 || Pistol<br>(1 Hand) || 5 || 20-30<br>(Ballistic) || 25.00 || 6.25 || 3%<br>(1.50x dmg) || 6 || 38 Ammo || 2.00 lbs || |
|- |
|- |
||
| − | | style="background-color:#000" | [[File:MSG10.png|50px|none]] || MSG-10 || |
+ | | style="background-color:#000" | [[File:MSG10.png|50px|none]] || MSG-10 || 3 || 25 || SMG<br>(2 Hand) || 5 || 20-30<br>(Ballistic) || 25.00 || 8.33 || 3%<br>(1.50x dmg) || 30 || 9mm Ammo || 5.00 lbs || |
|- |
|- |
||
| − | | style="background-color:#000" | [[File:AntiqueRevolver.png|50px|none]] || Antique Revolver || |
+ | | style="background-color:#000" | [[File:AntiqueRevolver.png|50px|none]] || Antique Revolver || 3 || 25 || Pistol<br>(1 Hand) || 6 || 30-40<br>(Ballistic) || 35.00 || 11.67 || 5%<br>(1.50x dmg) || 6 || 38 Ammo || 3.00 lbs || |
|- |
|- |
||
| − | | style="background-color:#000" | [[File:9mmPistol.png|50px|none]] || 9mm Pistol || |
+ | | style="background-color:#000" | [[File:9mmPistol.png|50px|none]] || 9mm Pistol || 4 || 25 || Pistol<br>(1 Hand) || 7 || 25-35<br>(Ballistic) || 30.00 || 7.50 || 3%<br>(1.50x dmg) || 8 || 9mm Ammo || 2.00 lbs || |
|- |
|- |
||
| − | | style="background-color:#000" | [[File:MK5.png|50px|none]] || MK5 || |
+ | | style="background-color:#000" | [[File:MK5.png|50px|none]] || MK5 || 4 || 35 || SMG<br>(2 Hand) || 6 || 30-50<br>(Ballistic) || 40.00 || 10.00 || 5%<br>(1.50x dmg) || 18 || 9mm Ammo || 7.00 lbs || |
|- |
|- |
||
| − | | style="background-color:#000" | [[File:LeverActionRifle.png|50px|none]] || Lever-Action Rifle || |
+ | | style="background-color:#000" | [[File:LeverActionRifle.png|50px|none]] || Lever-Action Rifle || 5 || 30 || Rifle<br>(2 Hand) || 8 || 30-40<br>(Ballistic) || 35.00 || 7.00 || 8%<br>(1.50x dmg) || 8 || 38 Ammo || 8.00 lbs || |
|- |
|- |
||
| − | | style="background-color:#000" | [[File:CompoundBow.png|50px|none]] || Compound Bow || |
+ | | style="background-color:#000" | [[File:CompoundBow.png|50px|none]] || Compound Bow || 6 || 1 || Bow<br>(2 Hand) || 10 || 25-40<br>(Piercing) || 32.50 || 5.42 || 10%<br>(1.50x dmg) || 1 || Arrow || 5.00 lbs || |
|- |
|- |
||
| − | | style="background-color:#000" | [[File:HuntingShotgun.png|50px|none]] || Hunting Shotgun || |
+ | | style="background-color:#000" | [[File:HuntingShotgun.png|50px|none]] || Hunting Shotgun || 5 || 40 || Shotgun<br>(2 Hand) || 4 || 30-50<br>(Ballistic) || 40.00 || 8.00 || 5%<br>(1.50x dmg) || 2 || Shotgun Shells || 7.00 lbs || [[Weapon Abilities#Knockdown|Knockdown]] (10%) |
|- |
|- |
||
| − | | style="background-color:#000" | [[File:AKA7.png|50px|none]] || AKA7 || |
+ | | style="background-color:#000" | [[File:AKA7.png|50px|none]] || AKA7 || 5 || 45 || Rifle<br>(2 Hand) || 7 || 35-65<br>(Ballistic) || 50.00 || 10.00 || 5%<br>(1.50x dmg) || 30 || 762 Ammo || 10.00 lbs || |
|- |
|- |
||
| − | | style="background-color:#000" | [[File:357Magnum.png|50px|none]] || 357 Magnum || |
+ | | style="background-color:#000" | [[File:357Magnum.png|50px|none]] || 357 Magnum || 4 || 30 || Pistol<br>(1 Hand) || 6 || 30-50<br>(Ballistic) || 40.00 || 10.00 || 5%<br>(1.50x dmg) || 6 || 357 Magnum Bullets || 3.00 lbs || |
|- |
|- |
||
| − | | style="background-color:#000" | [[File:PoliceShotgun.png|50px|none]] || Police Shotgun || |
+ | | style="background-color:#000" | [[File:PoliceShotgun.png|50px|none]] || Police Shotgun || 5 || 40 || Shotgun<br>(2 Hand) || 5 || 45-60<br>(Ballistic) || 52.50 || 10.50 || 3%<br>(1.50x dmg) || 5 || Shotgun Shells || 10.00 lbs || Knockdown (15%) |
|- |
|- |
||
| − | | style="background-color:#000" | [[File:Crossbow.png|50px|none]] || Crossbow || |
+ | | style="background-color:#000" | [[File:Crossbow.png|50px|none]] || Crossbow || 4 || 8 || Crossbow<br>(2 Hand) || 6 || 30-60<br>(Piercing) || 45.00 || 11.25 || 10%<br>(2.00x dmg) || 1 || Bolt || 8.00 lbs || |
|- |
|- |
||
| − | | style="background-color:#000" | [[File:SawedOffShotgun.png|50px|none]] || Sawed- |
+ | | style="background-color:#000" | [[File:SawedOffShotgun.png|50px|none]] || Sawed-Off Shotgun || 4 || 45 || Pistol<br>(1 Hand) || 2 || 40-70<br>(Ballistic) || 55.00 || 13.75 || 5%<br>(1.50x dmg) || 2 || Shotgun Shells || 5.00 lbs || [[Weapon Abilities#Knockback|Knockback]] (50%) |
|- |
|- |
||
| − | | style="background-color:#000" | [[File:MS4.png|50px|none]] || MS4 || 5 |
+ | | style="background-color:#000" | [[File:MS4.png|50px|none]] || MS4 || 5 || 30 || Rifle<br>(2 Hand) || 12 || 35-55<br>(Ballistic) || 45.00 || 9.00 || 7%<br>(1.50x dmg) || 20 || 5.56 Ammo || 10.00 lbs || |
|- |
|- |
||
| − | | style="background-color:#000" | [[File:CombatShotgun.png|50px|none]] || Combat Shotgun || |
+ | | style="background-color:#000" | [[File:CombatShotgun.png|50px|none]] || Combat Shotgun || 4 || 40 || Shotgun<br>(2 Hand) || 6 || 50-75<br>(Ballistic) || 62.50 || 15.63 || 3%<br>(1.50x dmg) || 8 || Shotgun Shells || 10.00 lbs || Knockdown (20%) |
|- |
|- |
||
| − | | style="background-color:#000" | [[File:HuntingRifle.png|50px|none]] || Hunting Rifle || |
+ | | style="background-color:#000" | [[File:HuntingRifle.png|50px|none]] || Hunting Rifle || 6 || 40 || Rifle<br>(2 Hand) || 10 || 50-90<br>(Ballistic) || 70.00 || 11.67 || 8%<br>(1.50x dmg) || 6 || 762 Ammo || 8.00 lbs || |
|} |
|} |
||
===Modded Ranged=== |
===Modded Ranged=== |
||
| + | Modded Ranged Weapons can be crafted, but there is also a rare chance to find them out in the field. |
||
| + | |||
{| class="wikitable sortable" style="text-align: center;" |
{| class="wikitable sortable" style="text-align: center;" |
||
|- |
|- |
||
| − | ! class="unsortable" | !! style="min-width:130px" | Name !! data-sort-type="number" | |
+ | ! class="unsortable" | !! style="min-width:130px" | Name !! data-sort-type="number" | Basic AP<br>Cost !! data-sort-type="number" | Noise !! data-sort-type="number" | Weapon<br>Class !! data-sort-type="number" | Range !! data-sort-type="number" | Damage !! data-sort-type="number" | (Avg. Dmg.) !! data-sort-type="number" | (Dmg./AP) !! data-sort-type="number" | Critical<br>Chance !! data-sort-type="number" | Ammo<br>Capacity !! data-sort-type="number" | [[Ammunition|Ammo]]<br>Type !! data-sort-type="number" | Weight !! data-sort-type="number" | Weapon Effects |
|- |
|- |
||
| − | | style="background-color:#000" | [[File:pistol_38_speedLoader.png|50px|none]] || Speed Loading 38 || |
+ | | style="background-color:#000" | [[File:pistol_38_speedLoader.png|50px|none]] || Speed Loading .38 || 4 || 25 || Pistol<br>(1 Hand) || 5 || 20-30<br>(Ballistic) || 25.00 || 6.25 || 3%<br>(1.50x dmg) || 6 || 38 Ammo || 2.50 lbs || |
|- |
|- |
||
| − | | style="background-color:#000" | [[File:Pistol_9mm_silenced.png|50px|none]] || Silenced 9MM || |
+ | | style="background-color:#000" | [[File:Pistol_9mm_silenced.png|50px|none]] || Silenced 9MM || 4 || 10 || Pistol<br>(1 Hand) || 7 || 25-35<br>(Ballistic) || 30.00 || 7.50 || 3%<br>(1.50x dmg) || 8 || 9mm Ammo || 2.50 lbs || |
|- |
|- |
||
| − | | style="background-color:#000" | [[File:Pistol_357_longBarrel.png|50px|none]] || Long Barrel Magnum || |
+ | | style="background-color:#000" | [[File:Pistol_357_longBarrel.png|50px|none]] || Long Barrel Magnum || 4 || 30 || Pistol<br>(1 Hand) || 8 || 35-60<br>(Ballistic) || 47.50 || 11.88 || 5%<br>(1.50x dmg) || 6 || 357 Magnum Bullets || 3.50 lbs || |
|- |
|- |
||
| − | | style="background-color:#000" | [[File:Shotgun_police_swat.png|50px|none]] || SWAT Shotgun || |
+ | | style="background-color:#000" | [[File:Shotgun_police_swat.png|50px|none]] || SWAT Shotgun || 5 || 40 || Shotgun<br>(2 Hand) || 5 || 50-65<br>(Ballistic) || 57.50 || 11.50 || 5%<br>(1.50x dmg) || 8 || Shotgun Shells || 11.00 lbs || [[Weapon Abilities#Knockdown|Knockdown]] (20%) |
|- |
|- |
||
| − | | style="background-color:#000" | [[File:Shotgun_combat_sighted.png|50px|none]] || Sighted Shotgun || |
+ | | style="background-color:#000" | [[File:Shotgun_combat_sighted.png|50px|none]] || Sighted Shotgun || 4 || 40 || Shotgun<br>(2 Hand) || 6 || 55-80<br>(Ballistic) || 67.50 || 16.88 || 8%<br>(1.50x dmg) || 8 || Shotgun Shells || 10.50 lbs || Knockdown (20%) |
|- |
|- |
||
| − | | style="background-color:#000" | [[File:Smg_mk5_supressed.png|50px|none]] || Suppressed MK5 || |
+ | | style="background-color:#000" | [[File:Smg_mk5_supressed.png|50px|none]] || Suppressed MK5 || 4 || 12 || SMG<br>(2 Hand) || 6 || 30-50<br>(Ballistic) || 40.00 || 10.00 || 5%<br>(1.50x dmg) || 18 || 9mm Ammo || 8.00 lbs || |
|- |
|- |
||
| − | | style="background-color:#000" | [[File:Rifle_aka7_highVolume.png|50px|none]] || High Volume AKA7 || |
+ | | style="background-color:#000" | [[File:Rifle_aka7_highVolume.png|50px|none]] || High Volume AKA7 || 5 || 45 || Rifle<br>(2 Hand) || 7 || 35-65<br>(Ballistic) || 50.00 || 10.00 || 5%<br>(1.50x dmg) || 45 || 762 Ammo || 12.00 lbs || |
|- |
|- |
||
| − | | style="background-color:#000" | [[File:Rifle_ms4_laserSight.png|50px|none]] || Laser Sighted MS4 || 5 |
+ | | style="background-color:#000" | [[File:Rifle_ms4_laserSight.png|50px|none]] || Laser Sighted MS4 || 5 || 30 || Rifle<br>(2 Hand) || 12 || 35-55<br>(Ballistic) || 45.00 || 9.00 || 10%<br>(1.50x dmg) || 20 || 5.56 Ammo || 10.50 lbs || |
|- |
|- |
||
| − | | style="background-color:#000" | [[File:SniperRifle.png|50px|none]] || Sniper Rifle || |
+ | | style="background-color:#000" | [[File:SniperRifle.png|50px|none]] || Sniper Rifle || 6 || 40 || Rifle<br>(2 Hand) || 15 || 70-90<br>(Ballistic) || 80.00 || 13.33 || 15%<br>(2.00x dmg) || 6 || 762 Ammo || 8.50 lbs || |
|} |
|} |
||
| Line 186: | Line 198: | ||
{| class="wikitable sortable" style="text-align: center;" |
{| class="wikitable sortable" style="text-align: center;" |
||
|- |
|- |
||
| − | ! class="unsortable" | !! style="min-width:130px" | Name !! data-sort-type="number" | |
+ | ! class="unsortable" | !! style="min-width:130px" | Name !! data-sort-type="number" | Basic AP<br>Cost !! data-sort-type="number" | Noise !! data-sort-type="number" | Weapon<br>Class !! data-sort-type="number" | Range !! data-sort-type="number" | Damage !! data-sort-type="number" | (Avg. Dmg.) !! data-sort-type="number" | (Dmg./AP) !! data-sort-type="number" | Critical<br>Chance !! data-sort-type="number" | Ammo<br>Capacity !! data-sort-type="number" | [[Ammunition|Ammo]]<br>Type !! data-sort-type="number" | Weight |
|- |
|- |
||
| − | | style="background-color:#000" | [[File:Platepiercer.png|50px|none]] || [[ |
+ | | style="background-color:#000" | [[File:Platepiercer.png|50px|none]] || [[Named Enemies#Shauna & Edwina|Platepiercer]] || 4 || 10 || Crossbow<br>(2 Hand) || 7 || 60-80<br>(Piercing) || 70.00 || 17.50 || 15%<br>(2.00x dmg) || 1 || Bolt || 10.00 lbs |
|- |
|- |
||
| − | | style="background-color:#000" | [[File:Sterling.png|50px|none]] || [[ |
+ | | style="background-color:#000" | [[File:Sterling.png|50px|none]] || [[Darlene Lumpkin#Events|Sterling]] || 6 || 1 || Bow<br>(2 Hand) || 10 || 40-60<br>(Piercing) || 50.00 || 8.33 || 15%<br>(1.50x dmg) || 1 || Arrow || 4.00 lbs |
|} |
|} |
||
==Special Weapons== |
==Special Weapons== |
||
| − | Special weapons include weapons that use charges and thrown weapons. While Thrown weapons are equipped in an Item slot, Charge weapons are equipped in a normal weapon slot. |
||
| − | |||
===Charge Weapons=== |
===Charge Weapons=== |
||
| − | Charge weapons are limited-use weapons |
+ | Charge weapons are limited-use weapons with a set number of charges before they are rendered useless (they can never be reloaded). These weapons often have powerful attacks and bonuses. |
| + | |||
| + | Charge weapons are equipped in a normal weapon slot. |
||
{| class="wikitable sortable" style="text-align: center;" |
{| class="wikitable sortable" style="text-align: center;" |
||
|- |
|- |
||
| − | ! class="unsortable" | !! style="min-width:130px" | Name !! data-sort-type="number" | |
+ | ! class="unsortable" | !! style="min-width:130px" | Name !! data-sort-type="number" | Basic AP<br>Cost !! data-sort-type="number" | Noise !! data-sort-type="number" | Weapon<br>Class !! data-sort-type="number" | Range !! data-sort-type="number" | Damage !! data-sort-type="number" | (Avg. Dmg.) !! data-sort-type="number" | (Dmg./AP) !! data-sort-type="number" | Undead<br>Dmg Mod !! data-sort-type="number" | Critical<br>Chance !! data-sort-type="number" | Strength<br>Required !! data-sort-type="number" | Break<br>Chance !! data-sort-type="number" | Ammo<br>Capacity !! data-sort-type="number" | Ammo<br>Type !! data-sort-type="number" | Weight !! data-sort-type="number" | Weapon Effects |
|- |
|- |
||
| − | | style="background-color:#000" | [[File:special_chainsaw.png|50px|none]] || Chainsaw || |
+ | | style="background-color:#000" | [[File:special_chainsaw.png|50px|none]] || Chainsaw || 7 || 50 || Special<br>(2 Hand) || 1 || 40-75<br>(Slash) || 57.50 || 8.21 || 100% || 10%<br>(3.00x dmg) || 8 || || || || 10.00 lbs || [[Weapon Abilities#Knockback|Knockback]] (20%), [[Status Effects#Bleeding|Bleed]] (80%) |
|- |
|- |
||
| − | | style="background-color:#000" | [[File:nailgun.png|50px|none]] || |
+ | | style="background-color:#000" | [[File:nailgun.png|50px|none]] || Nailgun || 3 || 8 || Pistol<br>(1 Hand) || 1 || 10-25<br>(Piercing) || 17.50 || 5.83 || || 8%<br>(2.50x dmg) || || || 12 || Special || 5.00 lbs || |
|- |
|- |
||
| − | | style="background-color:#000" | [[File:flaregun.png|50px|none]] || Flare Gun || |
+ | | style="background-color:#000" | [[File:flaregun.png|50px|none]] || Flare Gun || 3 || 20 || Pistol<br>(1 Hand) || 7 || 8-30<br>(Fire) || 19.00 || 6.33 || || 1%<br>(3.00x dmg) || || || 5 || Special || 2.00 lbs || [[Status Effects#Immolated|Immolate]] (100%) |
|- |
|- |
||
| − | | style="background-color:#000" | [[File:Pepperspray.png|50px|none]] || Pepper Spray || |
+ | | style="background-color:#000" | [[File:Pepperspray.png|50px|none]] || Pepper Spray || 4 || 5 || Special<br>(1 Hand) || 1 || 0-0<br>(Chemical) || 0.00 || 0.00 || 0% || 0%<br>(0.00x dmg) || 1 || || || || 0.50 lbs || [[Status Effects#Blind|Blind]] (100%) |
|- |
|- |
||
| − | | style="background-color:#000" | [[File:stungun.png|50px|none]] || Stun Gun || |
+ | | style="background-color:#000" | [[File:stungun.png|50px|none]] || Stun Gun || 4 || 8 || Special<br>(1 Hand) || 1 || 0-0<br>(Piercing) || 0.00 || 0.00 || 100% || 0%<br>(0.00x dmg) || 1 || || || || 0.50 lbs || [[Status Effects#Prone|Knockdown]] (100%), [[Status Effects#Dizzy|Dizzy]] (100%) |
|- |
|- |
||
| − | | style="background-color:#000" | [[File:torch.png|50px|none]] || Torch || |
+ | | style="background-color:#000" | [[File:torch.png|50px|none]] || Torch || 3 || 6 || Special<br>(1 Hand) || 1 || 5-15<br>(Fire) || 10.00 || 3.33 || 100% || 5%<br>(1.50x dmg) || 1 || 5% || || || 2.00 lbs || Immolate (50%), Knockback (20%) |
|} |
|} |
||
===Thrown Items=== |
===Thrown Items=== |
||
| + | Thrown items often have an area-of-effect (AoE). They all have a cost of 4 AP. |
||
| − | Thrown items live in the Item slot, not the Weapon slots, but are used during combat. Many of these have an area-of-effect (AOE) in addition to the Range that they can be thrown - so be careful that when you use them, you're not dropping them too close to yourself or your allies! |
||
| + | Thrown weapons are equipped in an Item slot. |
||
| − | Note that all thrown items cost 4 AP to throw. |
||
{| class="wikitable sortable" style="text-align: center;" |
{| class="wikitable sortable" style="text-align: center;" |
||
|- |
|- |
||
| − | ! class="unsortable" | !! style="min-width:130px" | Name !! data-sort-type="number" | |
+ | ! class="unsortable" | !! style="min-width:130px" | Name !! data-sort-type="number" | Basic AP<br>Cost !! data-sort-type="number" | Noise !! data-sort-type="number" | Weapon<br>Class !! data-sort-type="number" | Range !! data-sort-type="number" | Damage !! data-sort-type="number" | (Avg. Dmg.) !! data-sort-type="number" | (Dmg./AP) !! data-sort-type="number" | Attack<br>Radius !! data-sort-type="number" | Weight !! data-sort-type="number" | Weapon Effects | Timer |
|- |
|- |
||
| − | | style="background-color:#000" | [[File:Molotov.png|50px|none]] || Molotov || |
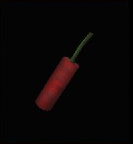
+ | | style="background-color:#000" | [[File:Molotov.png|50px|none]] || Molotov Cocktail || 4 || 15 || Thrown<br>(1 Hand) || 15 || 13-18<br>(Fire) || 15.50 || 3.88 || 1 || 0.50 lbs || [[Status Effects#Immolated|Immolate]] (100%) | Instant |
|- |
|- |
||
| − | | style="background-color:#000" | [[File:Firecracker.png|50px|none]] || Firecracker || |
+ | | style="background-color:#000" | [[File:Firecracker.png|50px|none]] || Firecracker || 4 || 45 || Thrown<br>(1 Hand) || 18 || 1-1<br>(Chemical) || 1.00 || 0.25 || 0 || 0.50 lbs || (Noise) | Instant |
|- |
|- |
||
| − | | style="background-color:#000" | [[File:Throw_incendiary.png|50px|none]] || Incendiary Grenade || |
+ | | style="background-color:#000" | [[File:Throw_incendiary.png|50px|none]] || Incendiary Grenade || 4 || 40 || Thrown<br>(1 Hand) || 18 || 30-50<br>(Fire) || 40.00 || 10.00 || 2 || 0.50 lbs || Immolate (100%) | Instant |
|- |
|- |
||
| − | | style="background-color:#000" | [[File:Nerve_gas.png|50px|none]] || Nerve Gas || |
+ | | style="background-color:#000" | [[File:Nerve_gas.png|50px|none]] || Nerve Gas || 4 || 10 || Thrown<br>(1 Hand) || 18 || 3-5<br>(Chemical) || 4.00 || 1.00 || 4 || 0.50 lbs || (Black out) | Instant |
|- |
|- |
||
| − | | style="background-color:#000" | [[File:Mine.png|50px|none]] || Mine || |
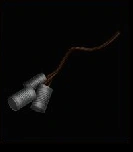
+ | | style="background-color:#000" | [[File:Mine.png|50px|none]] || Mine || 4 || 40 || Thrown<br>(1 Hand) || 1 || 45-80<br>(Piercing) || 62.50 || 15.63 || 1 || 2.00 lbs || [[Status Effects#Prone|Knockdown]] (100%) | Proximity |
|- |
|- |
||
| − | | style="background-color:#000" | [[File:Bola.png|50px|none]] || Bola || |
+ | | style="background-color:#000" | [[File:Bola.png|50px|none]] || Bola || 4 || 1 || Thrown<br>(1 Hand) || 5 || 1-10<br>(Bite) || 5.50 || 1.38 || 0 || 1.00 lbs || (Knockdown) | Instant |
|- |
|- |
||
| − | | style="background-color:#000" | [[File:throw_grenade.png|50px|none]] || Grenade || |
+ | | style="background-color:#000" | [[File:throw_grenade.png|50px|none]] || Grenade || 4 || 50 || Thrown<br>(1 Hand) || 18 || 50-80<br>(Piercing) || 65.00 || 16.25 || 2 || 0.50 lbs || (Knockdown) | Instant (And annoying) |
|- |
|- |
||
| − | | style="background-color:#000" | [[File:Throw_jarOfAcid.png|50px|none]] || Jar of Acid || |
+ | | style="background-color:#000" | [[File:Throw_jarOfAcid.png|50px|none]] || Jar of Acid || 4 || 8 || Thrown<br>(1 Hand) || 6 || 15-45<br>(Chemical) || 30.00 || 7.50 || 2 || 1.50 lbs || [[Status Effects#Bleeding|Bleed]] (100%) | Instant |
|- |
|- |
||
| − | | style="background-color:#000" | [[File:Noisemaker.png|50px|none]] || Noisemaker || |
+ | | style="background-color:#000" | [[File:Noisemaker.png|50px|none]] || Noisemaker || 4 || 30 || Thrown<br>(1 Hand) || 20 || 0-0<br>(Bite) || 0.00 || 0.00 || 0 || 0.50 lbs || (Noise) | Instant |
|- |
|- |
||
| − | | style="background-color:#000" | [[File:Tear_gas.png|50px|none]] || Tear Gas || |
+ | | style="background-color:#000" | [[File:Tear_gas.png|50px|none]] || Tear Gas || 4 || 20 || Thrown<br>(1 Hand) || 10 || 1-5<br>(Chemical) || 3.00 || 0.75 || 2 || 0.50 lbs || [[Status Effects#Dizzy|Dizzy]] (100%), [[Status Effects#Blind|Blind]] (100%) Instant |
|- |
|- |
||
| − | | style="background-color:#000" | [[File:Throw_timedExplosive.png|50px|none]] || Timed Explosive || |
+ | | style="background-color:#000" | [[File:Throw_timedExplosive.png|50px|none]] || Timed Explosive || 4 || 40 || Thrown<br>(1 Hand) || 1 || 80-150<br>(Piercing) || 115.00 || 28.75 || 6 || 2.00 lbs || Knockdown (100%) | 5 - 8 Turns (Not tested yet) |
|} |
|} |
||
| − | [[Category:Weapons]] |
+ | [[Category:Weapons| ]] |
Latest revision as of 04:19, 13 July 2021
Weapons are used during combat in Dead State.
Melee[ | ]
Melee weapons are able to inflict an array of Status Effects on an enemy. Many weapons include alternate attacks (accessed by right-clicking on the equipped weapon).
Each weapon has a Strength requirement which determines the effective damage output. A character who doesn't meet the Strength requirement can still wield the weapon but there is a 50% damage penalty. A character will do 1 additional damage for every point above the Strength requirement.
The Melee skill and an opponent's Agility affect melee to-hit chance (THC). The following are some examples of the THC modifier:
- THC is 75% for a character with a Melee skill of 1 against an opponent with 1 Agility, but decreases by 5% for each additional point of opponent Agility.
- THC is 100% for a character with a Melee skill of 6 against an opponent with 1 Agility, but decreases by 5% for each additional point of opponent Agility. THC also decreases by 5% for each point below a Melee skill of 6 (against the same opponent with 1 Agility).
- THC is 100% for a character with a Melee skill of 10 against an opponent with 5 Agility, but decreases by 5% for each additional point of opponent Agility. THC also decreases by 5% for each point below a Melee skill of 10 (against the same opponent with 5 Agility).
- Note: Screwdrivers are good to screw zombies so, Save some!
Normal Melee[ | ]
| Name | Basic AP Cost |
Noise | Weapon Class |
Range | Damage | (Avg. Dmg.) | (Dmg./AP) | Undead Dmg Mod |
Critical Chance |
Strength Required |
Break Chance |
Weight | Weapon Effects | |
|---|---|---|---|---|---|---|---|---|---|---|---|---|---|---|
| Screwdriver | 2 | 1 | Implement (1 Hand) |
1 | 1-10 (Piercing) |
5.50 | 2.75 | 115% | 5% (3.25x dmg) |
1 | 5% | 0.50 lbs | Counter (20%), Bleed (40%) | |
| Kitchen Knife | 3 | 2 | Knife (1 Hand) |
1 | 3-10 (Slash) |
6.50 | 2.17 | 40% | 10% (2.00x dmg) |
1 | 5% | 1.00 lbs | Counter (40%), Bleed (40%) | |
| Makeshift Pike | 5 | 3 | Polearm (2 Hand) |
1 | 5-20 (Piercing) |
12.50 | 2.50 | 40% | 5% (3.00x dmg) |
2 | 5% | 1.00 lbs | Knockback (10%), Knockdown (10%) | |
| Sickle | 3 | 6 | Knife (1 Hand) |
1 | 5-40 (Slash) |
22.5 | 7.50 | 80% | 5% (3.00x dmg) |
3 | 10% | 1.00 lbs | Bleed (40%) | |
| Cleaver | 4 | 4 | Knife (1 Hand) |
1 | 5-15 (Slash) |
10.00 | 2.50 | 50% | 10% (2.00x dmg) |
1 | 5% | 1.00 lbs | Bleed (20%), Counter (5%) | |
| Wood Plank | 4 | 6 | Bat (2 Hand) |
2 | 5-18 (Bludgeoning) |
11.50 | 2.88 | 100% | 5% (2.00x dmg) |
2 | 5% | 2.00 lbs | Dizzy (15%), Knockback (5%) | |
| Claw Hammer | 3 | 4 | Hammer (1 Hand) |
1 | 6-15 (Bludgeoning) |
10.50 | 3.50 | 125% | 5% (2.00x dmg) |
2 | 2.50 lbs | Counter (35%), Dizzy (20%) | ||
| Hatchet | 4 | 4 | Axe (1 Hand) |
1 | 8-18 (Slash) |
13.00 | 3.25 | 100% | 5% (3.00x dmg) |
3 | 5% | 2.00 lbs | Counter (5%), Bleed (40%) | |
| Machete | 4 | 4 | Knife (1 Hand) |
1 | 8-20 (Slash) |
14.00 | 3.50 | 60% | 10% (2.25x dmg) |
2 | 2.00 lbs | Bleed (50%), Counter (5%) | ||
| Tiller | 5 | 5 | Polearm (2 Hand) |
2 | 10-30 (Piercing) |
20.00 | 4.00 | 80% | 10% (3.00x dmg) |
3 | 5.00 lbs | Knockback (10%), Bleed (5%) | ||
| Crowbar | 5 | 5 | Club (1 Hand) |
1 | 12-20 (Bludgeoning) |
16.00 | 3.20 | 125% | 5% (2.50x dmg) |
4 | 4.00 lbs | Knockdown (10%), Dizzy (25%) | ||
| Nightstick | 4 | 4 | Club (1 Hand) |
1 | 12-20 (Bludgeoning) |
16.00 | 4.00 | 110% | 3% (2.00x dmg) |
3 | 1.00 lbs | Dizzy (30%), Counter (20%) | ||
| Combat Knife | 3 | 1 | Knife (1 Hand) |
1 | 12-18 (Slash) |
15.00 | 5.00 | 50% | 10% (2.00x dmg) |
1 | 1.00 lbs | Counter (50%), Bleed (35%) | ||
| Kukri | 3 | 1 | Knife (1 Hand) |
1 | 15-24 (Slash) |
19.50 | 6.50 | 80% | 5% (3.00x dmg) |
1 | 1.00 lbs | Counter (75%), Bleed (50%) | ||
| Pitchfork | 5 | 5 | Polearm (2 Hand) |
2 | 15-40 (Piercing) |
27.50 | 5.50 | 50% | 5% (3.25x dmg) |
4 | 4.00 lbs | Knockback (15%), Knockdown (25%), Bleed (10%) | ||
| Bowie Knife | 4 | 2 | Knife (1 Hand) |
1 | 18-30 (Slash) |
24.00 | 6.00 | 70% | 5% (3.00x dmg) |
3 | 2.00 lbs | Counter (50%), Bleed (50%) | ||
| Pipe Wrench | 5 | 6 | Club (1 Hand) |
1 | 18-25 (Bludgeoning) |
21.50 | 4.30 | 120% | 5% (2.50x dmg) |
6 | 3.00 lbs | Dizzy (20%), Knockdown (10%) | ||
| Combat Machete | 4 | 3 | Knife (1 Hand) |
1 | 18-26 (Slash) |
22.00 | 5.50 | 70% | 15% (2.25x dmg) |
3 | 1.00 lbs | Bleed (40%), Counter (10%) | ||
| Tree Trimmer | 5 | 4 | Polearm (2 Hand) |
2 | 18-30 (Slash) |
24.00 | 4.80 | 85% | 5% (2.50x dmg) |
5 | 5.00 lbs | Knockback (10%), Knockdown (15%), Bleed (25%) | ||
| Baseball Bat | 4 | 4 | Bat (2 Hand) |
1 | 18-28 (Bludgeoning) |
23.00 | 5.75 | 150% | 5% (2.00x dmg) |
4 | 2.00 lbs | Dizzy (20%) | ||
| Crash Axe | 4 | 4 | Axe (1 Hand) |
1 | 20-30 (Piercing) |
25.00 | 6.25 | 125% | 8% (2.25x dmg) |
3 | 2.00 lbs | Counter (50%), Bleed (50%) | ||
| Wood Axe | 6 | 6 | Axe (2 Hand) |
1 | 20-35 (Slash) |
27.50 | 4.58 | 150% | 10% (2.25x dmg) |
5 | 7.00 lbs | Bleed (15%) | ||
| Pickaxe | 6 | 6 | Axe (2 Hand) |
1 | 20-35 (Piercing) |
27.50 | 4.58 | 125% | 8% (3.00x dmg) |
7 | 4.00 lbs | Bleed (10%) | ||
| Shovel | 5 | 6 | Hammer (2 Hand) |
1 | 20-30 (Bludgeoning) |
25.00 | 5.00 | 110% | 5% (2.25x dmg) |
4 | 5.00 lbs | Knockback (10%), Knockdown (15%), Dizzy (20%) | ||
| Spear | 5 | 4 | Polearm (2 Hand) |
2 | 28-34 (Piercing) |
31.00 | 6.20 | 65% | 5% (3.00x dmg) |
3 | 3.00 lbs | Knockdown (35%), Bleed (40%) | ||
| Telescoping Baton | 3 | 3 | Club (1 Hand) |
1 | 20-25 (Bludgeoning) |
22.50 | 7.50 | 100% | 10% (2.00x dmg) |
2 | 2.00 lbs | Counter (40%), Dizzy (35%) | ||
| Aluminium Bat | 4 | 5 | Bat (2 Hand) |
1 | 24-32 (Bludgeoning) |
28.00 | 7.00 | 125% | 10% (2.00x dmg) |
3 | 2.00 lbs | Knockback (25%), Dizzy (30%) | ||
| Bastard Sword | 5 | 7 | Blade (2 Hand) |
1 | 28-50 (Slash) |
39.00 | 7.80 | 75% | 15% (2.75x dmg) |
7 | 10.00 lbs | Bleed (60%) | ||
| Sledgehammer | 7 | 7 | Hammer (2 Hand) |
1 | 28-50 (Bludgeoning) |
39.00 | 5.57 | 200% | 8% (2.00x dmg) |
6 | 6.00 lbs | Knockdown (15%, Dizzy (10%), Knockback (15%) | ||
| Brush Hook | 5 | 5 | Axe (2 Hand) |
1 | 30-45 (Slash) |
37.50 | 7.50 | 150% | 8% (2.50x dmg) |
6 | 3.00 lbs | Bleed (25%) | ||
| Fire Axe | 6 | 5 | Axe (2 Hand) |
1 | 35-50 (Slash) |
42.50 | 7.08 | 150% | 8% (2.50x dmg) |
4 | 4.00 lbs | Bleed (35%) | ||
| Railroad Hammer | 7 | 8 | Hammer (2 Hand) |
1 | 45-70 (Bludgeoning) |
57.50 | 8.21 | 200% | 8% (2.00x dmg) |
8 | 12.00 lbs | Knockback (20%), Knockdown (20%), Dizzy (15%) | ||
| Cricket Bat | 4 | 4 | Bat (2 Hand) |
1 | 22-36 (Bludgeoning) |
29.00 | 7.25 | 125% | 10% (2.00x dmg) |
4 | 3.00 lbs | Knockback (20%), Dizzy (25%) |
Unique Melee[ | ]
| Name | Basic AP Cost |
Noise | Weapon Class |
Range | Damage | (Avg. Dmg.) | (Dmg./AP) | Undead Dmg Mod |
Critical Chance |
Strength Required |
Weight | Weapon Effects | |
|---|---|---|---|---|---|---|---|---|---|---|---|---|---|
| Mr. Stabby | 4 | 2 | Knife (1 Hand) |
1 | 22-40 (Slash) |
31.00 | 7.75 | 70% | 5% (3.00x dmg) |
3 | 2.00 lbs | Counter (60%), Bleed (60%) | |
| Carbon Steel Tonfa | 4 | 4 | Club (1 Hand) |
1 | 22-26 (Bludgeoning) |
24.00 | 6.00 | 125% | 10% (2.00x dmg) |
3 | 1.50 lbs | Dizzy (35%), Counter (100%) | |
| Disaster Axe | 4 | 4 | Axe (1 Hand) |
1 | 30-40 (Piercing) |
35.00 | 8.75 | 125% | 10% (2.50x dmg) |
3 | 2.50 lbs | Counter (50%), Bleed (60%), Dizzy (15%) | |
| Electric Baton | 4 | 6 | Club (1 Hand) |
1 | 25-32 (Bludgeoning) |
28.50 | 7.13 | 100% | 10% (2.00x dmg) |
4 | 2.00 lbs | Counter (45%), Dizzy (45%), Knockdown (25%) | |
| Red On You | 4 | 4 | Bat (2 Hand) |
1 | 30-50 (Bludgeoning) |
40.00 | 10.00 | 125% | 10% (2.25x dmg) |
4 | 3.00 lbs | Knockback (30%), Dizzy (45%) | |
| Flanged Mace | 5 | 5 | Club (1 Hand) |
1 | 38-45 (Bludgeoning) |
41.50 | 8.30 | 150% | 10% (2.75x dmg) |
8 | 5.00 lbs | Knockdown (15%), Dizzy (40%) | |
| Dragoon | 5 | 4 | Polearm (2 Hand) |
2 | 40-45 (Piercing) |
42.50 | 8.50 | 65% | 10% (3.00x dmg) |
3 | 3.00 lbs | Knockdown (45%), Bleed (40%), Knockback (20%) | |
| Unasume | 5 | 3 | Blade (2 Hand) |
1 | 40-60 (Slash) |
50.00 | 10.00 | 70% | 5% (3.00x dmg) |
5 | 9.50 lbs | Bleed (70%) | |
| Carbon Fiber Bat | 5 | 5 | Bat (2 Hand) |
1 | 42-55 (Bludgeoning) |
48.50 | 9.70 | 125% | 5% (2.50x dmg) |
4 | 1.50 lbs | Knockback (25%), Dizzy (45%), Knockback (10%) | |
| Hackjob | 6 | 5 | Axe (2 Hand) |
1 | 45-60 (Slash) |
52.50 | 8.75 | 125% | 15% (2.75x dmg) |
4 | 5.00 lbs | Bleed (45%) | |
| Intimacy Problems | 6 | 4 | Polearm (2 Hand) |
2 | 40-65 (Slash) |
52.50 | 8.75 | 100% | 5% (3.00x dmg) |
6 | 4.00 lbs | Knockback (30%), Knockdown (40%), Bleed (35%) | |
| Snowblind | 5 | 7 | Blade (2 Hand) |
1 | 48-65 (Slash) |
56.50 | 11.30 | 100% | 15% (3.00x dmg) |
8 | 11.00 lbs | Bleed (70%), Dizzy (15%) | |
| Industrial Hammer | 7 | 8 | Hammer (2 Hand) |
1 | 65-100 (Bludgeoning) |
82.50 | 11.79 | 200% | 8% (2.00x dmg) |
10 | 20.00 lbs | Knockback (25%), Knockdown (25%), Dizzy (30%) |
Ranged[ | ]
Ranged weapon effectiveness is determined by the user's Ranged skill and Perception skill, as well as weapon range (how far away an opponent is) and the opponent's Agility. The Ranged skill affects damage output and Critical Chance, while the Perception skill and opponent Agility affects to-hit chance (THC). Weapon range affects all ranged modifiers (Damage, Critical Chance, and THC).
Damage output and Critical Chance are determined by the Ranged skill and affected by weapon range. A damage bonus (+10% to +50%) and Critical Chance bonus (+5% to +45%) will be applied for each point of Ranged skill above the respective range to target. For example, a 10% damage bonus is applied when the character's Ranged skill is 2 against an opponent at a range of 1. The bonus increases by 5% for each additional point of Ranged skill. In this same scenario (Ranged skill of 2 and target range 1), the Critical Chance bonus is 5% and increases by 5% for each additional point of Ranged skill.
A character's to-hit chance (THC) is determined by the Ranged skill, Perception Stat, weapon range, how far away an opponent is/enemy range, equipment/weapon bonuses, and the opponent's Agility. Although the manual does not indicate it, ranged skill gives 5% bonus THC per level. It seems the way ranged THC is described in the manual ("the attacker to-hit chance is measured by comparing the attacker's Perception skill with the Weapon Range (the effective distance away that a weapon can hit), then calculating that versus the target's Agility stat ") is not the way it was implemented in game. If it was, Sniper Rifles with 15 range would always give a 0% base THC even with a maximum 10 perception. So the "Ranged To-Hit Chart" in the manual that uses the term "Weapon Range", should have used the term range to target or enemy range. The range stat of a weapon has an effect on THC that is different from what the chart indicates-it is a linear 5% per Weapon Range inside the weapons range (0% at maximum range). So an enemy at a range of 6 shot by a weapon with Weapon Range 8 will receive a 10% bonus THC. Once you go beyond the Weapon Range there is a penalty of 25% per square of range.
THC decreases by 25% for every enemy range increment above the respective Perception skill. For example, a character with a Perception skill of 3, will have 100% THC against an enemy at a range of 3 (or closer). In the same scenario (with a Perception skill of 3), if enemy range is 4, then THC becomes 75%; a range of 5 will be 50% THC, a range of 6 is 25% THC, and a range of 7 or greater will be 0% THC. An opponent's Agility will affect THC anywhere from -10% to -55%. An opponent with 1 Agility will reduce THC by 10%, with a further reduction of 5% for each additional point of Agility.
This was tested in game with a variety of weapons on various Perception stat levels and ranged skill levels. For example, a Hunting Rifle (10 Weapon Range), Range skill of 1, Perception 5, Enemy Range 7, Enemy Agility 8: in game the THC is displayed as 25% (35% with Marksman Gloves). Comparing Perception to Enemy range, the base THC is 50%, Ranged skill of 1 gives 5%, enemy agility reduces THC by 45%. Weapon range surpasses enemy range by 3. This is +5% for each additional range so 15%. 50%+5%-45%+15%=25% The exact same set up with Ranged Skill 9 had a 65% THC (40% more for the 8 higher skill). So the calculation is: Base THC% + Ranged Skill bonus - Enemy Agility modifier +/- Weapon Range Modifier + Equipment modifiers + Weapon Bonuses.
However, this seems to break with the Sniper Rifle and Laser Sighted MS4 THC values, as when tested with 15 Weapon Range, Perception 5, Ranged Skill 1, Enemy Range 13, Enemy Agility 8 the game displayed THC of 45%. This should have been: Perception vs enemy range=0%, Ranged Skill +5%, Enemy Agility -45%. Weapon Range vs enemy range gives 2 extra weapon range=+5%+5%=+10% THC. This sums to a -30% THC and should have displayed as 0% So there is an extra 75% THC coming from somewhere, possibly a hidden bonus on the Sniper Rifle. Similarly, the Laser Sighted MS4 seems to have a hidden +50% THC as all calculations were off by this amount. So there are some undisclosed bonuses when using certain guns.
Normal Ranged[ | ]
| Name | Basic AP Cost |
Noise | Weapon Class |
Range | Damage | (Avg. Dmg.) | (Dmg./AP) | Critical Chance |
Ammo Capacity |
Ammo Type |
Weight | Weapon Effects | |
|---|---|---|---|---|---|---|---|---|---|---|---|---|---|
| .38 Snubnose | 4 | 25 | Pistol (1 Hand) |
5 | 20-30 (Ballistic) |
25.00 | 6.25 | 3% (1.50x dmg) |
6 | 38 Ammo | 2.00 lbs | ||
| MSG-10 | 3 | 25 | SMG (2 Hand) |
5 | 20-30 (Ballistic) |
25.00 | 8.33 | 3% (1.50x dmg) |
30 | 9mm Ammo | 5.00 lbs | ||
| Antique Revolver | 3 | 25 | Pistol (1 Hand) |
6 | 30-40 (Ballistic) |
35.00 | 11.67 | 5% (1.50x dmg) |
6 | 38 Ammo | 3.00 lbs | ||
| 9mm Pistol | 4 | 25 | Pistol (1 Hand) |
7 | 25-35 (Ballistic) |
30.00 | 7.50 | 3% (1.50x dmg) |
8 | 9mm Ammo | 2.00 lbs | ||
| MK5 | 4 | 35 | SMG (2 Hand) |
6 | 30-50 (Ballistic) |
40.00 | 10.00 | 5% (1.50x dmg) |
18 | 9mm Ammo | 7.00 lbs | ||
| Lever-Action Rifle | 5 | 30 | Rifle (2 Hand) |
8 | 30-40 (Ballistic) |
35.00 | 7.00 | 8% (1.50x dmg) |
8 | 38 Ammo | 8.00 lbs | ||
| Compound Bow | 6 | 1 | Bow (2 Hand) |
10 | 25-40 (Piercing) |
32.50 | 5.42 | 10% (1.50x dmg) |
1 | Arrow | 5.00 lbs | ||
| Hunting Shotgun | 5 | 40 | Shotgun (2 Hand) |
4 | 30-50 (Ballistic) |
40.00 | 8.00 | 5% (1.50x dmg) |
2 | Shotgun Shells | 7.00 lbs | Knockdown (10%) | |
| AKA7 | 5 | 45 | Rifle (2 Hand) |
7 | 35-65 (Ballistic) |
50.00 | 10.00 | 5% (1.50x dmg) |
30 | 762 Ammo | 10.00 lbs | ||
| 357 Magnum | 4 | 30 | Pistol (1 Hand) |
6 | 30-50 (Ballistic) |
40.00 | 10.00 | 5% (1.50x dmg) |
6 | 357 Magnum Bullets | 3.00 lbs | ||
| Police Shotgun | 5 | 40 | Shotgun (2 Hand) |
5 | 45-60 (Ballistic) |
52.50 | 10.50 | 3% (1.50x dmg) |
5 | Shotgun Shells | 10.00 lbs | Knockdown (15%) | |
| Crossbow | 4 | 8 | Crossbow (2 Hand) |
6 | 30-60 (Piercing) |
45.00 | 11.25 | 10% (2.00x dmg) |
1 | Bolt | 8.00 lbs | ||
| Sawed-Off Shotgun | 4 | 45 | Pistol (1 Hand) |
2 | 40-70 (Ballistic) |
55.00 | 13.75 | 5% (1.50x dmg) |
2 | Shotgun Shells | 5.00 lbs | Knockback (50%) | |
| MS4 | 5 | 30 | Rifle (2 Hand) |
12 | 35-55 (Ballistic) |
45.00 | 9.00 | 7% (1.50x dmg) |
20 | 5.56 Ammo | 10.00 lbs | ||
| Combat Shotgun | 4 | 40 | Shotgun (2 Hand) |
6 | 50-75 (Ballistic) |
62.50 | 15.63 | 3% (1.50x dmg) |
8 | Shotgun Shells | 10.00 lbs | Knockdown (20%) | |
| Hunting Rifle | 6 | 40 | Rifle (2 Hand) |
10 | 50-90 (Ballistic) |
70.00 | 11.67 | 8% (1.50x dmg) |
6 | 762 Ammo | 8.00 lbs |
Modded Ranged[ | ]
Modded Ranged Weapons can be crafted, but there is also a rare chance to find them out in the field.
| Name | Basic AP Cost |
Noise | Weapon Class |
Range | Damage | (Avg. Dmg.) | (Dmg./AP) | Critical Chance |
Ammo Capacity |
Ammo Type |
Weight | Weapon Effects | |
|---|---|---|---|---|---|---|---|---|---|---|---|---|---|
| Speed Loading .38 | 4 | 25 | Pistol (1 Hand) |
5 | 20-30 (Ballistic) |
25.00 | 6.25 | 3% (1.50x dmg) |
6 | 38 Ammo | 2.50 lbs | ||
| Silenced 9MM | 4 | 10 | Pistol (1 Hand) |
7 | 25-35 (Ballistic) |
30.00 | 7.50 | 3% (1.50x dmg) |
8 | 9mm Ammo | 2.50 lbs | ||
| Long Barrel Magnum | 4 | 30 | Pistol (1 Hand) |
8 | 35-60 (Ballistic) |
47.50 | 11.88 | 5% (1.50x dmg) |
6 | 357 Magnum Bullets | 3.50 lbs | ||
| SWAT Shotgun | 5 | 40 | Shotgun (2 Hand) |
5 | 50-65 (Ballistic) |
57.50 | 11.50 | 5% (1.50x dmg) |
8 | Shotgun Shells | 11.00 lbs | Knockdown (20%) | |
| Sighted Shotgun | 4 | 40 | Shotgun (2 Hand) |
6 | 55-80 (Ballistic) |
67.50 | 16.88 | 8% (1.50x dmg) |
8 | Shotgun Shells | 10.50 lbs | Knockdown (20%) | |
| Suppressed MK5 | 4 | 12 | SMG (2 Hand) |
6 | 30-50 (Ballistic) |
40.00 | 10.00 | 5% (1.50x dmg) |
18 | 9mm Ammo | 8.00 lbs | ||
| High Volume AKA7 | 5 | 45 | Rifle (2 Hand) |
7 | 35-65 (Ballistic) |
50.00 | 10.00 | 5% (1.50x dmg) |
45 | 762 Ammo | 12.00 lbs | ||
| Laser Sighted MS4 | 5 | 30 | Rifle (2 Hand) |
12 | 35-55 (Ballistic) |
45.00 | 9.00 | 10% (1.50x dmg) |
20 | 5.56 Ammo | 10.50 lbs | ||
| Sniper Rifle | 6 | 40 | Rifle (2 Hand) |
15 | 70-90 (Ballistic) |
80.00 | 13.33 | 15% (2.00x dmg) |
6 | 762 Ammo | 8.50 lbs |
Unique Ranged[ | ]
| Name | Basic AP Cost |
Noise | Weapon Class |
Range | Damage | (Avg. Dmg.) | (Dmg./AP) | Critical Chance |
Ammo Capacity |
Ammo Type |
Weight | |
|---|---|---|---|---|---|---|---|---|---|---|---|---|
| Platepiercer | 4 | 10 | Crossbow (2 Hand) |
7 | 60-80 (Piercing) |
70.00 | 17.50 | 15% (2.00x dmg) |
1 | Bolt | 10.00 lbs | |
| Sterling | 6 | 1 | Bow (2 Hand) |
10 | 40-60 (Piercing) |
50.00 | 8.33 | 15% (1.50x dmg) |
1 | Arrow | 4.00 lbs |
Special Weapons[ | ]
Charge Weapons[ | ]
Charge weapons are limited-use weapons with a set number of charges before they are rendered useless (they can never be reloaded). These weapons often have powerful attacks and bonuses.
Charge weapons are equipped in a normal weapon slot.
| Name | Basic AP Cost |
Noise | Weapon Class |
Range | Damage | (Avg. Dmg.) | (Dmg./AP) | Undead Dmg Mod |
Critical Chance |
Strength Required |
Break Chance |
Ammo Capacity |
Ammo Type |
Weight | Weapon Effects | |
|---|---|---|---|---|---|---|---|---|---|---|---|---|---|---|---|---|
| Chainsaw | 7 | 50 | Special (2 Hand) |
1 | 40-75 (Slash) |
57.50 | 8.21 | 100% | 10% (3.00x dmg) |
8 | 10.00 lbs | Knockback (20%), Bleed (80%) | ||||
| Nailgun | 3 | 8 | Pistol (1 Hand) |
1 | 10-25 (Piercing) |
17.50 | 5.83 | 8% (2.50x dmg) |
12 | Special | 5.00 lbs | |||||
| Flare Gun | 3 | 20 | Pistol (1 Hand) |
7 | 8-30 (Fire) |
19.00 | 6.33 | 1% (3.00x dmg) |
5 | Special | 2.00 lbs | Immolate (100%) | ||||
| Pepper Spray | 4 | 5 | Special (1 Hand) |
1 | 0-0 (Chemical) |
0.00 | 0.00 | 0% | 0% (0.00x dmg) |
1 | 0.50 lbs | Blind (100%) | ||||
| Stun Gun | 4 | 8 | Special (1 Hand) |
1 | 0-0 (Piercing) |
0.00 | 0.00 | 100% | 0% (0.00x dmg) |
1 | 0.50 lbs | Knockdown (100%), Dizzy (100%) | ||||
 |
Torch | 3 | 6 | Special (1 Hand) |
1 | 5-15 (Fire) |
10.00 | 3.33 | 100% | 5% (1.50x dmg) |
1 | 5% | 2.00 lbs | Immolate (50%), Knockback (20%) |
Thrown Items[ | ]
Thrown items often have an area-of-effect (AoE). They all have a cost of 4 AP.
Thrown weapons are equipped in an Item slot.
| Name | Basic AP Cost |
Noise | Weapon Class |
Range | Damage | (Avg. Dmg.) | (Dmg./AP) | Attack Radius |
Weight | Weapon Effects | Timer | |
|---|---|---|---|---|---|---|---|---|---|---|---|
| Molotov Cocktail | 4 | 15 | Thrown (1 Hand) |
15 | 13-18 (Fire) |
15.50 | 3.88 | 1 | 0.50 lbs | Immolate (100%) | Instant | |
 |
Firecracker | 4 | 45 | Thrown (1 Hand) |
18 | 1-1 (Chemical) |
1.00 | 0.25 | 0 | 0.50 lbs | Instant |
| Incendiary Grenade | 4 | 40 | Thrown (1 Hand) |
18 | 30-50 (Fire) |
40.00 | 10.00 | 2 | 0.50 lbs | Instant | |
 |
Nerve Gas | 4 | 10 | Thrown (1 Hand) |
18 | 3-5 (Chemical) |
4.00 | 1.00 | 4 | 0.50 lbs | Instant |
| Mine | 4 | 40 | Thrown (1 Hand) |
1 | 45-80 (Piercing) |
62.50 | 15.63 | 1 | 2.00 lbs | Knockdown (100%) | Proximity | |
 |
Bola | 4 | 1 | Thrown (1 Hand) |
5 | 1-10 (Bite) |
5.50 | 1.38 | 0 | 1.00 lbs | Instant |
| Grenade | 4 | 50 | Thrown (1 Hand) |
18 | 50-80 (Piercing) |
65.00 | 16.25 | 2 | 0.50 lbs | Instant (And annoying) | |
| Jar of Acid | 4 | 8 | Thrown (1 Hand) |
6 | 15-45 (Chemical) |
30.00 | 7.50 | 2 | 1.50 lbs | Bleed (100%) | Instant | |
 |
Noisemaker | 4 | 30 | Thrown (1 Hand) |
20 | 0-0 (Bite) |
0.00 | 0.00 | 0 | 0.50 lbs | Instant |
 |
Tear Gas | 4 | 20 | Thrown (1 Hand) |
10 | 1-5 (Chemical) |
3.00 | 0.75 | 2 | 0.50 lbs | Dizzy (100%), Blind (100%) Instant |
| Timed Explosive | 4 | 40 | Thrown (1 Hand) |
1 | 80-150 (Piercing) |
115.00 | 28.75 | 6 | 2.00 lbs | 5 - 8 Turns (Not tested yet) |